
Swansea: 01792 784078 Cardiff: 02920 022461

Our opening Hours:
Monday - 08:00-17:00
Tuesday - 08:00-17:00
Wednesday - 08:00-17:00
Thursday - 08:00-17:00
Friday - 08:00-17:00
Saturday - Closed
Sunday - Closed

IPS Blog

TIDAL & The Selsia Repair Network

Independent Paint Supplies are proud to be a member of the TIDAL Group*; a group of strategically placed Independent Paint Distributors across the whole of the UK. TIDAL have now become the preferred supply partner for the Selsia Repair Network.   Press Release: Selsia Network & TIDAL Group In Strategic Partnership Selsia and TIDAL have entered into a joint strategic partnership which will see significant benefits for Selsia approved repairers, insurers and fleets. TIDAL is fast becoming the refinish industry’s preferred independent distributor network and they’re shaking up the market with a fresh, exciting distribution alliance which helps forge partnerships…

Read more

TIDAL & The Selsia Repair Network

Independent Paint Supplies are proud to be a member of the TIDAL Group*; a group of strategically placed Independent Paint Distributors across the whole of the UK. TIDAL have now become the preferred supply partner for the Selsia Repair Network.   Press Release: Selsia Network & TIDAL Group In Strategic Partnership Selsia and TIDAL have entered into a joint strategic partnership which will see significant benefits for Selsia approved repairers, insurers and fleets. TIDAL is fast becoming the refinish industry’s preferred independent distributor network and they’re shaking up the market with a fresh, exciting distribution alliance which helps forge partnerships…

Read more

Sanding Curved Panels and Edges: When to Use a Soft Interface Pad
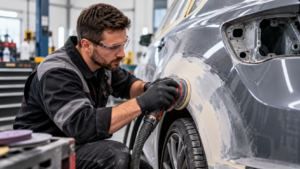
Sanding Curved Panels and Edges: When a Soft Interface Pad Can Help

A soft interface pad can make a curved bumper or wheel arch sand beautifully evenly, yet use it near an edge or body line and you risk sanding straight through…
Read more…

Read more

Aluminium Oxide vs Silicon Carbide vs Ceramic: Abrasive Grains Compared
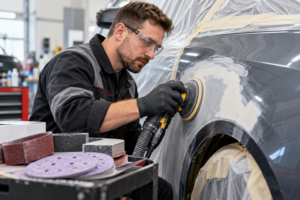
Key Takeaways Picking the right abrasive grain depends on the sanding stage, the grit, the backing and the coating structure, not the grain's name alone Aluminium oxide works as a sharp, tough, general-purpose grain, but its real performance depends on the grade and construction of the product it's built into Silicon carbide is harder and more regular in shape than aluminium oxide and not as brittle, which makes it a common choice for wet sanding clearcoat and finishing work Ceramic grains are engineered to fracture and expose fresh cutting edges, but this doesn't guarantee longer life on every job Technicians should check technical data sheets and trial new abrasives under controlled conditions before switching grain types mid-process Walk into any bodyshop's abrasives cupboard and the shelves tell a story: dozens of discs, sheets and belts, each labelled with a grain name and a grit number. It's tempting to treat those names like a simple hierarchy, as though ceramic always beats silicon carbide, which always beats aluminium oxide. Real-world sanding works differently, and choosing on name alone can leave a technician with the wrong tool for the stage in front of them. Why Grain Name Alone Won't Cut It A sanding product is far more than its grit number or the mineral printed on the back. The abrasive grain, the backing material, the coating structure and the overall product design all combine to decide how a disc or sheet actually performs on the panel. Two products using the same grain can behave completely differently once backing flexibility, coat density and anti-loading treatments are factored in. This matters because bodyshop work moves through distinct stages, each with its own demands. Shaping filler, keying primer and finishing clearcoat all call for different cutting characteristics, and no single grain type handles every one of them equally well. Aluminium oxide, silicon carbide and ceramic grains are common across abrasive product ranges, but understanding the differences between them helps technicians specify correctly rather than guess. The practical upshot is straightforward: treat grain type as one input among several, not the whole decision. Grit, backing format, coating style and compatibility with the sanding tool and extraction system all deserve equal weight before a product reaches the panel. Aluminium Oxide: Sharp, Tough, General-Purpose Aluminium oxide remains one of the most widely used abrasive grains in bodyshop work, and for good reason. It's commonly described as sharp and tough enough to handle a broad range of general sanding applications, from mild steel preparation to paint stripping. Its durability under pressure makes it a dependable workhorse for tasks that don't demand a specialised finish. That said, performance varies by grade and construction. An aluminium oxide disc built for heavy metalwork will behave very differently from one designed for lighter featheredging, even though both share the same core mineral. The material being worked on also plays a part, since mild steel, filler and old paint layers all respond differently to the same grain. For general-purpose paint removal and metal sanding, aluminium oxide remains a sensible default, but the specific product grade still needs matching to the job. Silicon Carbide: Finer Finish, More Brittle Silicon carbide grains have a different physical structure from aluminium oxide. Compared with aluminium oxide, silicon carbide is more regular in shape and not as brittle, which allows it to cut cleanly through tougher or harder substrates, including glass, stone, non-ferrous metals, plastics and fibreglass. That more regular shape can also produce a finer surface finish in certain applications, which is part of why it turns up so often in intermediate sanding stages. Suitability still depends on the specific product and substrate, so technicians shouldn't assume every silicon carbide abrasive suits the same automotive task. In wet sanding of clearcoat, lacquer and hard plastics, silicon carbide paired with waterproof paper or film is a standard combination because finish quality matters most at that stage. Checking the wet/dry rating, scratch consistency and clogging resistance of a specific product remains the safer approach before assuming performance. Ceramic Grain: Engineered for Demanding Jobs Ceramic abrasive grains sit at the more specialised end of the range, built for demanding sanding and grinding applications where consistent cutting performance under heavy use matters most. Some engineered ceramic grains are designed to fracture at a microscopic level as they wear, continually exposing fresh cutting edges rather than dulling evenly like a conventional grain. That self-sharpening behaviour is a genuine product-design feature, but it's worth being clear-eyed about what it does and doesn't promise. Fracturing to expose new edges doesn't guarantee a ceramic abrasive will outlast every alternative on every repair; outcomes still depend on the specific product construction, the grade and how it's matched to the task at hand. Ceramic grains tend to earn their keep on heavier material removal and tougher metalworking jobs rather than light finishing work, where their extra cost may not translate into a noticeable benefit. Matching Abrasives to Each Repair Stage A bodyshop rarely needs one abrasive for an entire repair. Different stages call for different grains, grits and formats, and building a sensible range of products avoids both wasted cost and under-performance. Shaping, Stripping and Metalwork Early-stage work such as shaping filler, stripping old paint and sanding mild steel usually favours a tougher, general-purpose grain like aluminium oxide. These tasks demand durability and consistent cutting over large surface areas rather than an ultra-fine finish, so a coarser grit on a sturdy backing tends to be the practical choice. Primer Keying and Intermediate Sanding Keying between primer coats calls for a finer touch. A commonly referenced range sits around P400 to P600 for dry sanding, or P600 to P800 for wet sanding, with the panel left to dry fully after wet sanding before any recoat. Silicon carbide often performs well here thanks to its finer, more regular cut, though the recommended grit should always be checked against the specific primer manufacturer's instructions before sanding begins. Clearcoat Finishing and Blending Finishing and blending clearcoat is typically where silicon carbide comes into its own, commonly used with waterproof paper or film across a grit range from around 800 up to 2000. This stage prioritises surface consistency and scratch pattern over aggressive material removal, so a finer grain that breaks down predictably is often preferable to a tougher, more aggressive one. Beyond Grain: Backing, Coating and Grit Grain type is only one piece of the specification puzzle. Backing material, coating structure and grit selection all shape how an abrasive performs on the panel, and overlooking any of them can undo the benefit of choosing the right grain in the first place. Backing and format - paper, polyester film, foam, mesh and flexible sponge backings each offer a different balance of flexibility, cutting performance, dust extraction and surface consistency, so the backing needs to suit the intended tool and the contour being worked. Coating structure - open or closed coating, along with anti-loading treatments, affects how well an abrasive sheds sanding debris rather than clogging and losing its cut partway through a job. Grit selection - the grade should always be chosen to match the coating system being used, refining the scratch pattern appropriately before moving to the next stage. Machine and extraction compatibility - the backing pad and dust-control setup need to be checked against the product format to avoid mismatched performance or poor dust capture. Cost in use is worth weighing properly too. Comparing grain names or pack prices on their own tells very little; assessing how a product performs across an entire job, including how many panels it gets through before losing its edge, gives a far more honest picture of value. Switching Grains Safely in the Workshop Changing from one grain type to another, or moving suppliers, is not something to do mid-job without a plan. Abrasive colours and product names are not standardised across manufacturers, so visual similarity between two discs says nothing about how they'll actually perform. Before adopting a replacement abrasive, trial it under controlled conditions on a test panel or a low-risk area of a repair, and confirm the resulting surface meets the requirements of the paint system being used. This matters particularly when switching between aluminium oxide, silicon carbide and ceramic grains, since their cutting behaviour and breakdown characteristics differ enough to change scratch depth, finish consistency and the number of passes needed to achieve the same result. Specification, Not Marketing, Decides Performance The best abrasive grain for a job is the one specified and suited to that particular task, built into a product compatible with the tool and process being used. Grain type provides a useful starting point for comparison, but it should never replace a full look at the product specification, including grit, backing, coating and intended application. Keeping abrasives organised by manufacturer, grade and application, rather than relying on memory or colour-matching, helps ensure the right product reaches the right stage every time. When uncertainty arises about whether a particular abrasive suits a specific coating system or substrate, checking with the abrasive and coating manufacturers directly remains the safest route before substituting one product for another. For technicians building or refreshing a workshop's abrasive range, matching grain, grit and backing to each repair stage pays off in finish quality and consistency. Those ready to put this into practice can browse abrasives from IPS Paint for shaping, priming and finishing stages alike.
Think ceramic always outperforms aluminium oxide or silicon carbide? Bodyshop reality is messier. Learn why grain name alone can’t tell you which abrasive belongs on filler, primer or clearcoat, and...
Read more...
Read more

Sanding Disc Compatibility: Matching Size, Attachment & Dust Extraction
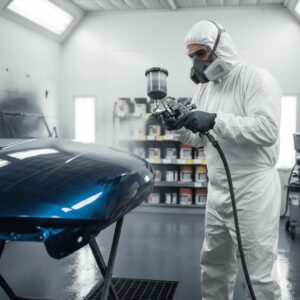
Why Sanding Disc Compatibility Matters: Size, Attachment and Dust Extraction
A disc that spins just fine can still wreck your finish. Diameter, attachment type and hole pattern all have to line up with your sander, or you’ll be chasing swirl...
Read more...
Read more

Net Abrasives vs Conventional Discs: What Bodyshops Should Consider
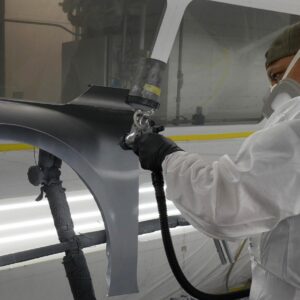
Net Abrasives vs Conventional Sanding Discs: What Should a Bodyshop Consider?
Grabbing whatever disc is nearest might be costing your bodyshop in rework and wasted time. One overlooked factor, how each disc clears sanding dust, quietly determines finish quality, disc life...
Read more...
Read more

Discs, Sheets, Strips & Rolls: Choosing Sanding Abrasives for Bodyshop Repairs
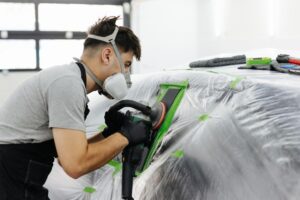
Sanding Discs, Sheets, Strips or Rolls? IPS Paint Guide Compares Formats
Grabbing the wrong disc, sheet or strip can quietly undo hours of bodywork, causing adhesion issues that only surface once the panel’s painted. Which format actually suits your repair, tool...
Read more...
Read more

Post-Valet Handover Checks: Paint, Trim & Finish Before Release
Key Takeaways Agree the scope of the valet before carrying out the final inspection. Check paint, wheels, lower panels, glass and mirrors in suitable lighting for residue, water marks and missed areas. Inside, inspect visible trim, seats, mats, footwells, touch surfaces and internal glass. Make sure fabrics are adequately dry and that controls or grip surfaces have not been left greasy or slippery. Record anything outside the agreed service scope and note any product, surface or issue that needs follow-up.The final moments before a car leaves the bay matter more than almost any other part of the job. A customer rarely remembers how long a polish took or which compound was used, but they will remember a swirl mark caught in the afternoon sun or a smear left across the rear windscreen. Getting the handover right protects the hours of work that came before it. Why The Final Check Decides Satisfaction A detail can be technically excellent and still leave a customer unhappy if the final inspection is rushed or skipped altogether. Professional detailers know the handover moment is where quality is actually judged, not during the wash, the correction stage, or the application of protection. Dealerships and bodyshops use dedicated quality inspection checklists for exactly this reason, verifying that every element of the work meets customer standards before a vehicle is returned or displayed. Skipping a proper final check creates two separate risks. First, defects that were always there, or new damage picked up during handling, go unnoticed until the customer spots them, at which point trust is harder to rebuild. Second, genuine detailing faults such as missed panels, residue, or product haze get discovered by the client rather than the business, turning a routine collection into an awkward conversation. IPS Paint supplies bodyshops and valeters across South Wales with the products and technical knowledge that support a reliable finish. Check the Exterior in Good Light Walk around the vehicle in good light and inspect the paint from more than one angle. Look for remaining product residue, water marks and obvious areas that have been missed. Check the wheels, wheel arches and lower panels against the service that was agreed with the customer. A maintenance valet and a more extensive detailing job should not be judged against the same checklist, so the final inspection should always reflect the work that was actually booked. For bodyshop work, inspect the repaired area under suitable lighting and follow the paint system's own handover procedure. Check the Exterior in Good Light Walk around the vehicle in good light and inspect the paint from more than one angle. Look for remaining product residue, water marks and obvious areas that have been missed. Check the wheels, wheel arches and lower panels against the service that was agreed with the customer. A maintenance valet and a more extensive detailing job should not be judged against the same checklist, so the final inspection should always reflect the work that was actually booked. For bodyshop work, inspect the repaired area under suitable lighting and follow the paint system's own handover procedure. Record Exceptions and Follow-Up If a stain, coating defect, paint mark or other issue falls outside the agreed service, record it clearly rather than attempting to conceal it with a dressing or promising that it can be removed. For each job, note what was completed, any exceptions identified during the final inspection and any product, surface or issue that needs follow-up. This creates a consistent record that another team member can understand and helps make the handover process repeatable. Building A Consistent Handover Checklist Consistency turns a good final check into a reliable business process rather than something left to memory or mood. A written or digital checklist, used on every vehicle regardless of job size, ensures nothing gets skipped when the workshop is busy or a collection time is looming. A practical handover checklist can include: Paint checked from more than one angle for residue, water marks and obvious missed areas Wheels, wheel arches and lower panels checked against the agreed service External glass and mirrors checked from inside and outside Touch surfaces and visible interior trim checked for residue Seats, mats, footwells and internal glass checked against the agreed service Fabrics checked to ensure they are adequately dry for handover Controls and grip surfaces checked for greasy or slippery residue Bottles, cloths and tools removed from the vehicle Exceptions and anything requiring follow-up recorded clearly Treating this list as a standard part of the workflow, rather than a box-ticking exercise reserved for complaints, builds the kind of reputation that keeps customers returning and referring others. A Thorough Check Is The Last Step That Actually Matters Every stage of a detail, from pre-wash through correction to protection, sets up the final result, but the handover check is what the customer actually experiences. Catching a swirl mark, a smeared window or a greasy dash before release costs only minutes; missing one costs trust that is far harder to earn back. For a checklist that holds up job after job, start with a reliable range of detailing and finishing products built for the final stages of the process, where the small details end up deciding the whole result.
A perfect polish means nothing if a swirl mark catches the afternoon sun at handover. Learn the exact lighting trick, trim checks, and documentation habit professional detailers use to catch...
Read more...
Read more

Interior Cleaners: IPS Paint Picks Products by Surface, Not “Universal” Labels

Choosing interior cleaners by surface, not by the word “universal”
A vehicle interior combines several different materials, and a cleaner suitable for one surface may not be approved for another. Identify the material first, then choose the cleaning method and...
Read more...
Read more

Heavy Grime, Fresh Paint or Trim? IPS Explains Choosing the Right Wheel Cleaner
Choosing a wheel cleaner when the wheel finish is uncertain
When a wheel’s finish is unknown or it has been refurbished, choosing a cleaner by strength alone is risky. Check the finish, condition and product instructions first, then confirm that...
Read more...
Read more

How to Calculate the True Cost Per Vehicle of Valeting Concentrates

Comparing the cost of valeting concentrates per vehicle
A larger bottle or concentrated valeting product is not automatically better value. Trade buyers should compare how much correctly prepared product is used per vehicle. Pack price, dilution and working...
Read more...
Read more

Snow Foam or Traffic Film Remover? Choosing the Right Pre-Wash per Job

Comparing the cost of valeting concentrates per vehicle
Grabbing whichever pre-wash is closest could cost you your paintwork. Snow foam and traffic film remover tackle completely different grime levels, and using the wrong one risks swirl marks, stripped...
Read more...
Read more

Polishing Holograms: Find the Cause Before Reworking the Panel
Polishing Holograms: Find the Cause Before Reworking the Panel
That flawless respray can hide a costly secret: shimmering holograms that only appear under direct sunlight. Before you grab the buffer again, learn why dark panels reveal them fastest and...
Read more...
Read more

Silicone-Free Label Not Enough? IPS Paint on Post-Repair Polish Choice
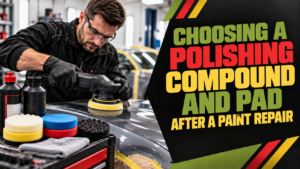
Choosing a polishing compound and pad after a paint repair
A “silicone-free” label is useful when selecting products for a bodyshop, but it does not automatically confirm that a product is suitable for every surface, repair stage or refinishing area....
Read more...
Read more