
Poor Dust Extraction in Sanding: Why Whole Setup Matters, Not Just Abrasive
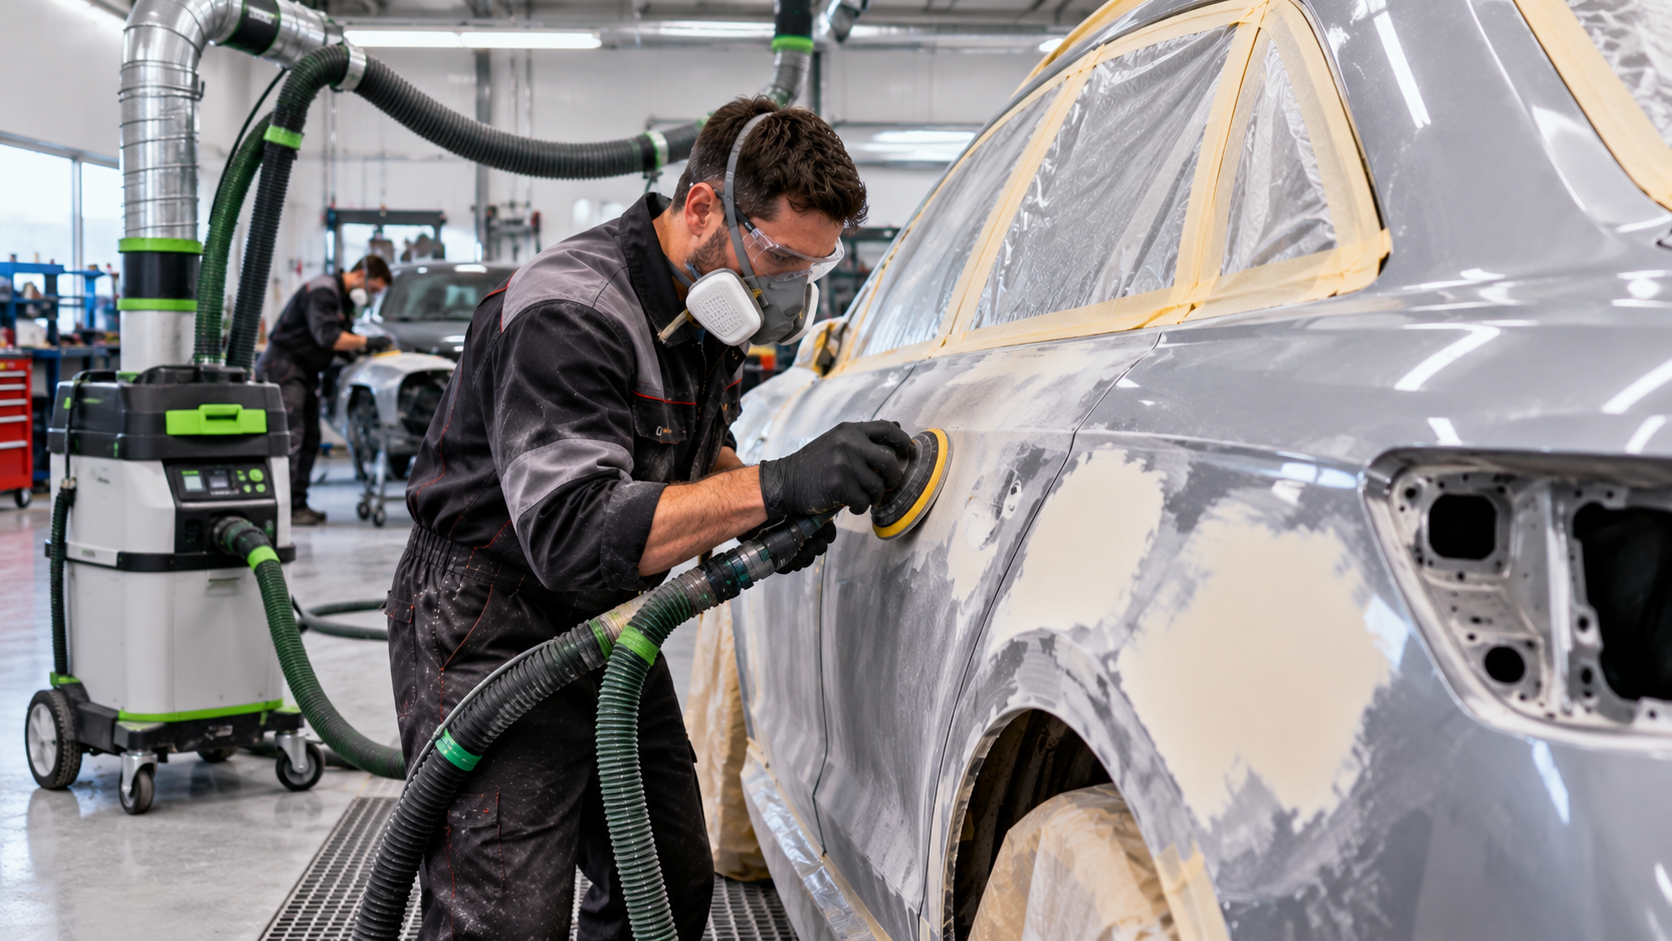
Still seeing dust haze on panels after sanding? Swapping discs might be a wasted fix. A six-step troubleshooting chain reveals where airflow actually breaks down, and the culprit is rarely the abrasive alone.
Key Takeaways
- Dust collection during sanding depends on how the abrasive, backing pad, sander, hose, extractor and filters work together, not on the abrasive disc on its own
- A disc that physically fits a pad but does not match its hole or mesh pattern can quietly block the extraction path technicians rely on
- A six-step troubleshooting checklist helps bodyshop technicians work through abrasive compatibility, pathways, pad condition, hose and filter health, extractor suitability and operator habits in order
- Dust extraction is one control measure among several, so suitable PPE and ventilation still matter even when a setup is working well
- IPS Paint stocks abrasive ranges suited to bodyshop repair work, alongside guidance on keeping the whole system matched
Panels that still carry a fine haze of dust after sanding often get blamed on the wrong culprit. Technicians reach for a different disc, assume the grade is wrong, or decide the abrasive brand has let them down. The real issue often sits somewhere else entirely, in the system doing the collecting.
Dust Left Behind? It’s Not Just the Disc
Sanding dust control depends on several parts working together: the abrasive, the backing pad, the machine, the hose, the extractor unit, the filters, and the way the operator uses all of it. Swap one part and the whole balance can shift, sometimes in ways that are hard to spot until dust starts settling where it shouldn’t.
A disc can look perfectly compatible and still cause problems. It might click onto the pad without issue, spin smoothly, and cut the panel exactly as expected, yet still choke off the very airflow it was supposed to work with. Chasing a single faulty part rarely solves a collection problem that stems from the whole setup, which is why reviewing abrasive and pad choices together tends to pay off more than swapping discs alone.
When dust keeps turning up on the panel or drifting into the work area, the smarter move is to step back and look at the complete chain rather than fixating on the abrasive. That wider view is where real improvements tend to start.
Why the Whole System Decides Collection
Dust extraction during powered sanding works as a single system, not a loose collection of parts bolted together. Treating it that way from the outset makes troubleshooting far easier later.
Tool, Hood, Unit and Tubing Must Work Together
On-tool extraction setups are built from four connected pieces: the sanding tool itself, the hood or pad that captures dust at the source, the extraction unit that pulls air through, and the tubing that carries dust away. The Health and Safety Executive notes that these components need to function together as a system, rather than being treated as separate items that simply happen to be connected.
A mismatch anywhere along that chain changes the result. A sander with strong airflow design means little if the hose connecting it to the extractor is the wrong diameter, cracked, or poorly seated. Each link in the chain has a job to do, and a weak link undermines everything positioned around it.
Choosing an Extractor Fit for the Job
General commercial vacuums are not automatically suitable for automotive sanding work. HSE guidance points out that extraction units should be matched to the specific demands of the task, rather than selected on the assumption that any vacuum with enough suction will do.
Workshop layout matters too. Trade press reporting from BodyShop Business notes that a central extraction system’s suitability depends on how many technicians will draw on it at once and on the shop’s floor plan, since both affect where the main unit sits and how far the pipe runs extend. Positioning a central unit near the middle of a workshop can shorten pipe runs and reduce the vacuum loss that comes with longer distances, while retractable flexible hoses connected to a central system can make ventilated sanders more practical to use day to day.
Get the Abrasive and Pad Right
Abrasive choice plays a genuine role in dust collection, but only once it is matched correctly to the pad and machine beneath it.
Matching Mesh or Perforations to the Pad
Some abrasives use an open net structure that offers dust a wide number of pathways through to the extractor. Others depend on a pattern of perforations that must line up precisely with holes in the backing pad. Both approaches can work well, but only when the format matches what the machine and pad are designed to use.
A disc that attaches and spins without trouble is not automatically the right one. If its holes sit out of alignment with the pad’s extraction pattern, dust has nowhere to go and starts collecting where it shouldn’t. Following the machine and abrasive manufacturer’s instructions for compatible components removes most of this guesswork from the outset.
Grade, Wear and Pressure Affect Cutting
Using the correct abrasive grade for the repair stage keeps cutting consistent and reduces the temptation to compensate with extra pressure. Worn, damaged or clogged abrasive should be replaced rather than pushed through another panel, since a tired disc struggles to cut cleanly regardless of how well the rest of the system is set up.
Leaning harder on a sander is not a reliable fix for poor cutting. Excessive pressure can affect finish quality and put unnecessary strain on the tool, often without actually improving dust collection. Keeping the abrasive flat, controlled, and matched to the task tends to produce more consistent results than forcing the pace.
Maintain Hoses, Filters and Channels
Even a well-matched abrasive and pad combination struggles against a system that isn’t being maintained properly further down the line.
Spotting a Full Bag, Blocked Filter or Leaking Hose
A full dust bag, a blocked filter, a damaged hose or a poorly seated connection can all quietly reduce how much dust an extractor actually collects. These issues tend to build gradually, so performance can drop off well before anyone notices a dramatic change. Inspecting and maintaining equipment according to its manufacturer’s instructions catches most of these problems early.
Resist the temptation to bypass filters or modify extraction equipment in an attempt to force more airflow through. Changes like these can undermine the health controls the system was designed to provide, even if they appear to improve suction in the short term.
Cleaning Extraction Channels Regularly
Sanders themselves need internal attention too. One tool manufacturer’s instruction manual recommends cleaning a sander’s extraction channels roughly once a week, with more frequent cleaning advised when work involves synthetic resin, wet sanding or plaster. Keeping a suitable hose connected and ensuring the tool’s extraction channels and cooling openings stay clear, as specified in its instructions, protects both performance and the tool itself over time.
A Six-Step Extraction Troubleshooting Checklist
When dust collection falls short, working through the system methodically beats guessing at a single cause. A practical sequence runs like this:
- Check whether the abrasive is actually compatible with the pad and machine in use.
- Confirm that holes or mesh pathways are clear and properly aligned, as the system requires.
- Inspect the backing pad for damage or clogging.
- Examine the hose, connections, filter and bag for wear, blockages or leaks.
- Consider whether the extractor itself is suitable for the tool and material, and whether it has been maintained correctly.
- Review whether operators are using the system as instructed.
Working through these points in order, rather than jumping straight to replacing the abrasive, tends to reveal the actual weak point far faster.
Dust Extraction Is One Control, Not a Guarantee
Sanding dust carries a respiratory and wider exposure risk, and extraction equipment is one control measure within a broader set of protections, not proof on its own that an area is free of harmful particles. HSE guidance for motor vehicle repair recommends tools with built-in extraction or portable local exhaust ventilation for powered discing and sanding work, alongside FFP2 respiratory protection where extraction effectiveness makes that necessary. Separating body filling and preparation work from other tasks also helps limit how many people are exposed to dust and fume generated during the job. Even dust that contains no specific harmful substances can be damaging to health simply through the quantity generated, which is why keeping it to a minimum matters regardless of composition.
Suitable personal protective equipment, workplace ventilation and risk controls remain necessary alongside extraction equipment, in line with HSE guidance and the employer’s own risk assessment. A clean-looking panel does not, by itself, confirm that exposure has been properly controlled.
Trial Changes Under Controlled Conditions
Workshops considering a different abrasive or extraction setup get more reliable answers by recording details rather than relying on impressions. Noting the product, machine, pad, extractor condition and repair stage for each trial creates a fair basis for comparison.
Comparing visible dust, cleanup effort, abrasive life and finish consistency across these controlled trials makes it far easier to tell whether a genuine improvement has occurred, or whether a result is simply down to a particularly clean panel on the day. Judging extraction performance purely by appearance skips over details that only show up through this kind of structured comparison.
Checking the Whole Setup Reveals Weak Collection
Poor dust collection rarely comes down to one faulty component working in isolation. Abrasive, pad, machine, hose, extractor, filters and working method all pull in the same direction when the system is right, and any one of them can quietly undermine the rest when it isn’t. Working through the full chain, rather than reaching straight for a different disc, tends to uncover the actual weak point far more reliably.
For technicians looking to start that review with the right materials on hand, it helps to browse compatible abrasives for bodyshop sanding work from IPS Paint.